

Welcome to the highly-anticipated second part of our chatbot creation journey! In Part 1, we established the core of our project, integrating Amity Chat and OpenAI’s language model into a TypeScript Node.js backend.
Now In this Part 2 step-by-step guide, we will walk you through setting up your Expo React-Native development environment, integrate with Amity React Native Chat UI Kit for faster development and out-of-the-box User Interface and Functionalities. We are ready to offer a dynamic, engaging, and responsive chatbot app thanks to the advantages of React Native.
Without further ado, let’s jump into the tutorial!
Step 1: Set Up Your React Native Development Environment
- Install Node.js and npm: If you haven’t already, grab Node.js and npm from their official sources and follow the installation instructions for your operating system.
- Get Expo CLI: Expo is your trusty sidekick for React Native development. Open your terminal and run this command to install Expo globally:
3. Create a New React Native Project: It’s time to birth your project! Run the following command, replacing “YourProjectName” with your desired project name:
4. Follow the prompts, and when asked, choose the “blank (TypeScript)” template. Easy, right?
5. Navigate to Your Project: Use cd YourProjectName in your terminal to navigate to your newly created project directory or you can open the project in your IDE e.g. VSCode and open a terminal there.
Step 2: Setting up Amity React Native Chat UIKit
Now, let’s infuse the Amity React Native Chat UI Kit into your project for some chatbot magic.
- Clone UI Kit: In your project directory, run the following command in the terminal to clone the Amity UI Kit:
2. Navigate to the UI Kit Folder: Type the command below in the terminal to move into the UI Kit directory:
3. Install necessary libraries within the UI Kit: Type the command below in the terminal to install libraries.
4. Build the UI Kit Package: Type the command below to build.
Now you will see a new <span id="greylight" class="greylight">.tgz</span> file generated from this command.
Step 3: Link UI Kit to your React Native Project
Now we’re going to link our built UI Kit to the main Expo React Native Project.
- Go to your project’s root directory and copy a generated <span id="greylight" class="greylight">.tgz</span> file to your application folder where you need to use the UI Kit.
- In your terminal, cd back to your main project’s main directory and run the following commands line by line.
Congratulations! You’ve successfully linked the UI Kit to your main project.
Step 4: Setting up for iOS
To make the UI Kit fully operational on iOS, a few configuration and installation steps are required. Here’s what you need to do:
- Add Required Permissions: Open your <span id="greylight" class="greylight">info.plist</span> file located at <span id="greylight" class="greylight">{ProjectRootDirectory}/ios/{YourAppName}/Info.plist</span> and insert the following permissions:
Step 5: Setting up for Android
- This step is a breeze! All you have to do is sync your project’s Gradle files, and you’re ready to roll.
Step 6: Integrate Amity React Native Chat UIKit
Now, it’s showtime! Open your <span id="greylight" class="greylight">App.tsx</span> file in your project, and drop in the following code. Don't forget to customize <span id="greylight" class="greylight">apiKey</span>, <span id="greylight" class="greylight">apiRegion</span>, <span id="greylight" class="greylight">userId</span>, and <span id="greylight" class="greylight">displayName</span> ,<span id="greylight" class="greylight">apiEndpoint</span> with your specific values. Make sure that it’s the same API Key and Server Region as the one you’ve built on Part 1 of this tutorial and ensure that userId is different from the chatbot.
With this, you’re all set! Run your React Native app and watch the Chat UI Kit spring to life.
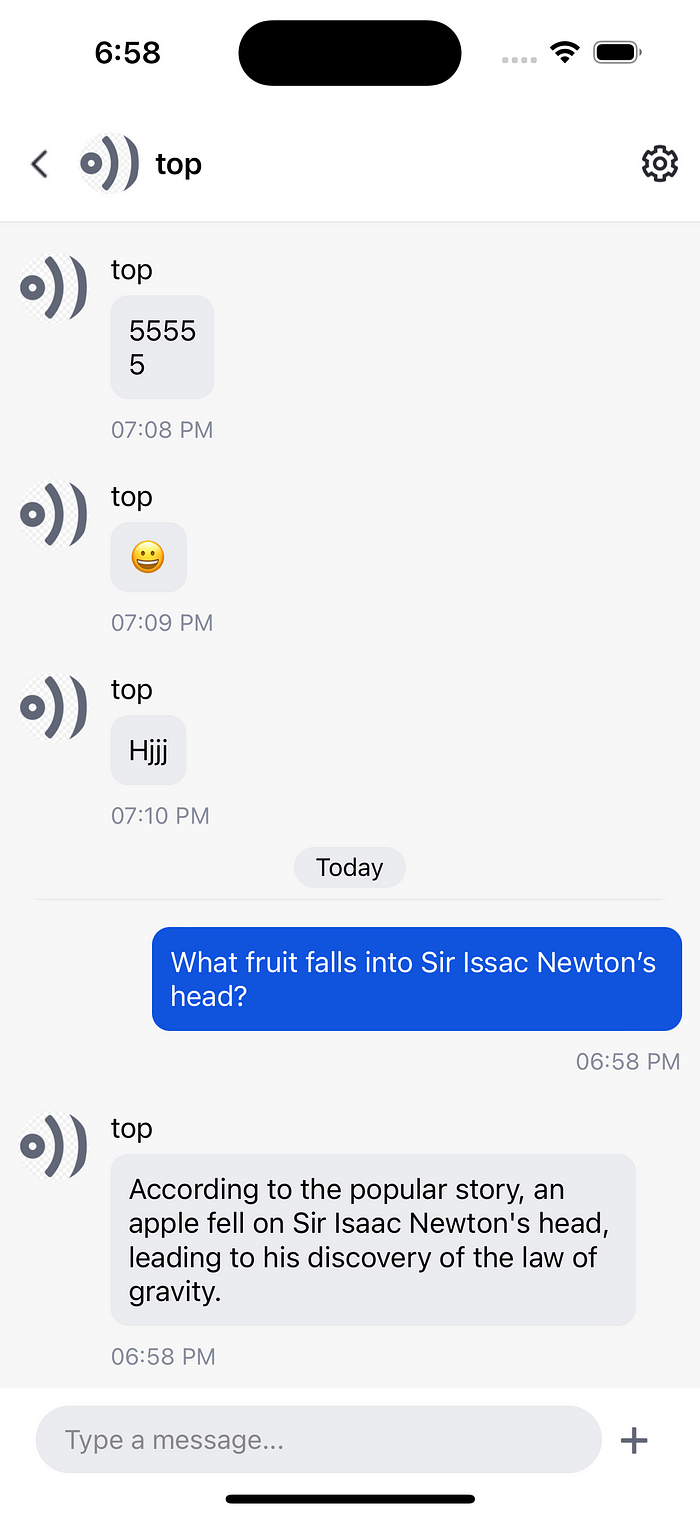
Step 7: Start the conversation with the Chatbot
Once you’ve launched the UI Kit, you will see an enriched UI provided by Amity. Now it’s time to create a conversation with the chatbot. Don’t forget to keep running our server in localhost and ngrok as mentioned in Part 1 of this tutorial.
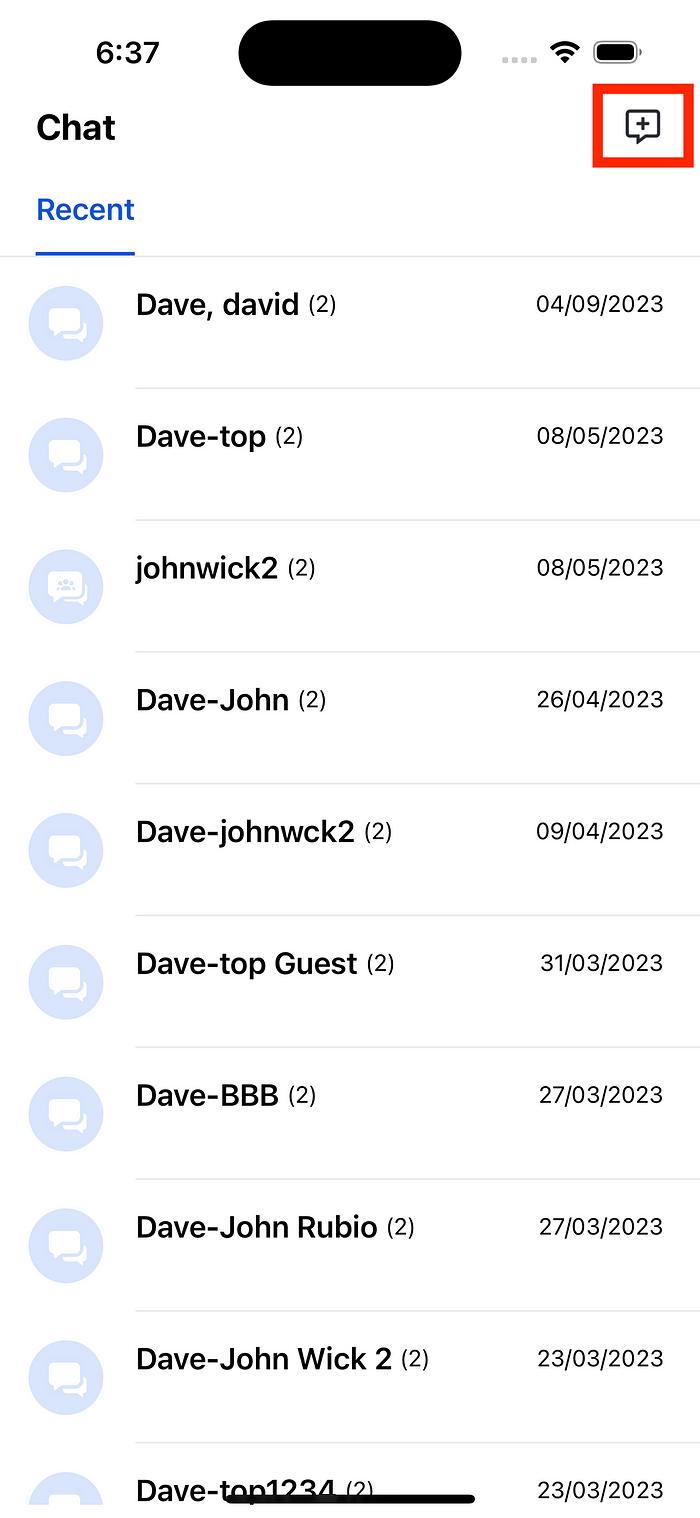
- Click on create conversation icon at the top right corner of the screen.
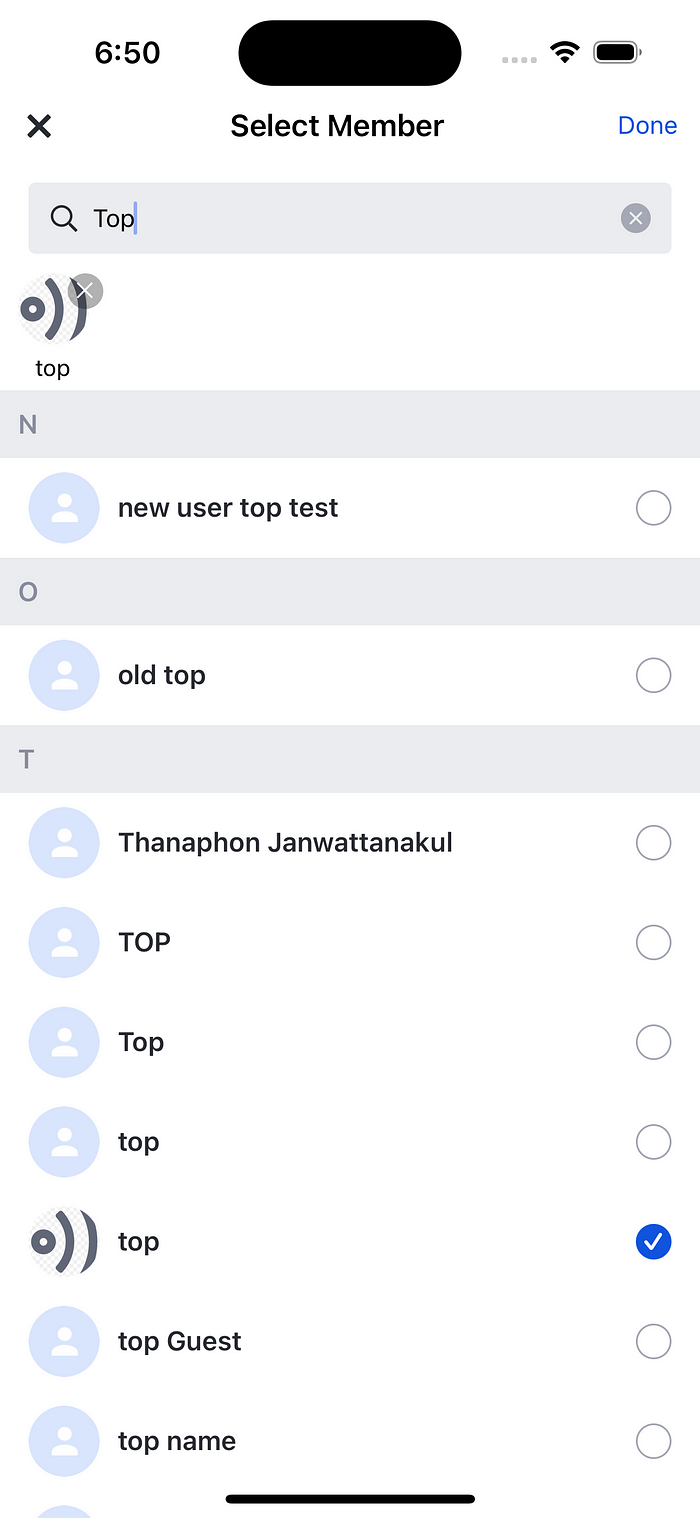
2. Select the Chatbot user ( In this case my Chatbot display name is Top )
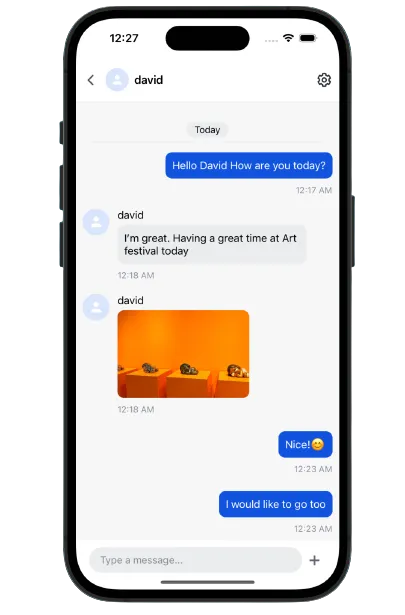
3. Now the UI Kit will navigate you to the chat room with your Chatbot, now go ahead, ask it a question!
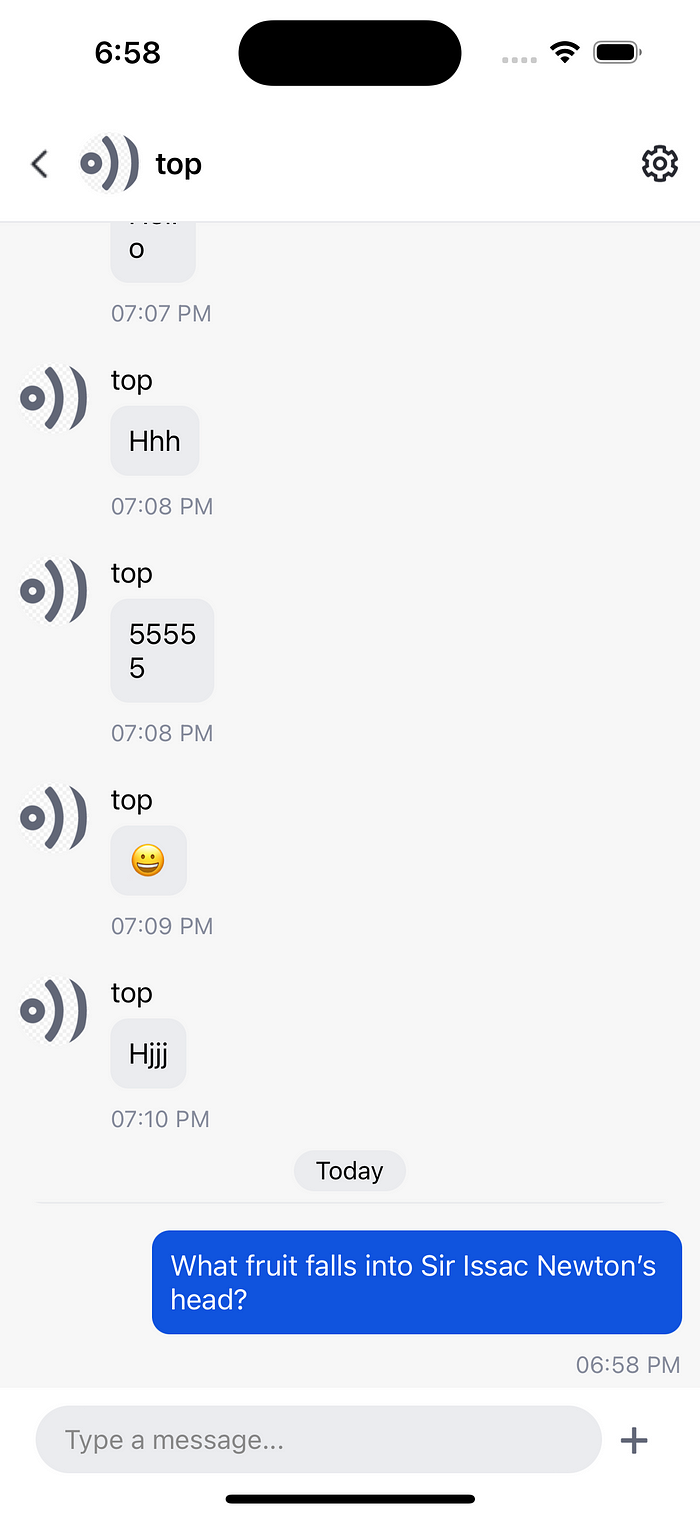
4. Boom! The chatbot responds to you, and the conversation begins!
Conclusion
In this extensive journey of constructing a React Native Chatbot App, we’ve explored the horizons of technology to achieve something truly exceptional. Part 2 of our expedition has illuminated the user-friendly nature of Amity React Native Chat UI Kit.
Amity React Native Chat UI Kit has consistently demonstrated its elegance and ease of integration throughout this journey. Seamlessly fitting into your React Native project, it provides a pre-built user interface and functions that effortlessly transform your app into a compelling chatbot hub. What used to be complex tasks, such as creating the chat list or conversation interface, have been dramatically simplified to a straightforward process.
As we set out to establish a discussion with our chatbot, the UI Kit proved to be a reliable guide. We were engaged in a chatroom, communicating with our digital buddy, with just a few clicks. The chatbot’s prompt responses added a magical element for the user.
With the tremendous capabilities of OpenAI’s superior AI engine and the variety of the Amity-powered React Native UI Kit, you have the ability to create chat experiences that will fascinate your consumers. The horizon of chatbot creation has never been more tempting, inviting you to continue on this adventure of creativity and limitless possibilities!
If you want to know more about Amity’s features, feel free to explore more on our website. And if you’re certain that a ready-made solution is more suitable for your business vision and goal, begin your journey by contacting us!